With little preparation I found myself sitting at my kitchen table ready to mache. I mixed up the homemade glue, found a couple molds for my baskets, ripped up last week's edition of The Mountain Eagle, and I was ready to craft. At least I thought I was ready to craft. Three days in and I've found paper mache a lot messier than I remember and it's been a lot of trial and error... more error than anything. Oops! :)
Bear in mind that these Easter baskets are a work in progress, an experiment that I will tweak as time goes on. The first run provided a couple rough looking baskets, and while the rough edges can definitely be appreciated from an artsy stand point, I'm sure as I play with the mache I will find a better technique to create a more flawless look. Then again there's always sandpaper which absolutely can be used on paper mache. It's dries a lot stronger than one might think. Shall we look at some steps?
Make sure when you mix your homemade paper mache paste that the mixture is as smooth as possible. I used my handy whisk to remove any remaining lumps. You want the mixture to be thinner than glue and quite runny. Play with the recipe and find the consistency that is best for you. One of the molds I used was an old terracotta flower pot. I covered the pot in a thin layer of petroleum jelly to make the paper mache cast easier to remove.
The second mold I used was a small metal pail. Again I covered the pail in a thin layer of petroleum jelly. Ideally you should only do one layer of paper mache at a time. The first night I allowed the layer to dry overnight, but I realized that process was going to take forever and I devised a plan.....
I took the molds and laid them on top of our electric heater. You definitely don't want to leave them unattended as paper and heat can create fire, but I monitored the molds and before I knew it the new layers were completely dry! Think about it... both terracotta and metal are conductors of heat so laying them on top of the heater basically "baked" the paper mache layers. Pretty neat right?
Even with the small layer of petroleum jelly on the molds the baskets still needed to be slit down the back for easy removal. Once the baskets have been removed from the molds you simply take a few more layers of newspaper to close the cut. These baskets are 4 layers thick and as you can clearly see they stand on their own and hold their shape quite well. Now all that's left to do is decorate the baskets and surprisingly this has been the trickiest part for me.
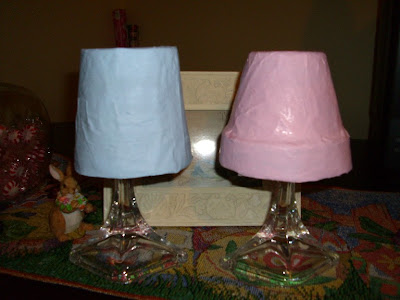
First I painted the baskets in pretty pastel colors. The first two I painted baby blue and pale pink. Don't they look like little lampshades while hanging over my candle sticks to dry? :)
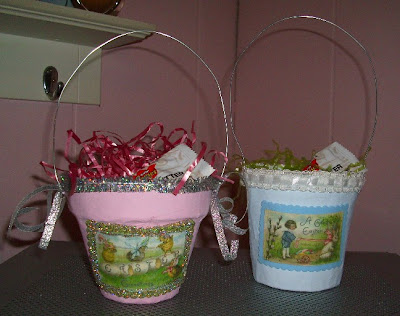
Hmmm. I'm very undecided about them. I guess it's "cute" but it's not what I was looking for. Of course, this is only my first and a quick shopping trip may produce some new ribbon and embellishments. I used what I had on hand and I can't say I'm feeling it very much. The handle is wire, but it needs something... ribbon? flowers? beads? Hmmm. I shall ponder it.
On my second attempt I decided to go a little more bare. Not so much glitter. Not too much frill. I'm still not feeling it. I definitely love my vintage Easter images... that part is working for me... but the overall effect is not quite pleasing me. I think this might be my first self-proclaimed craft fail. I'm on the fence.
Side by side. I'm still undecided. I don't love them, but I don't hate them. I feel they are "unfinished" but adding to them could border on tacky. Perhaps a craft shopping trip can inspire me. I need stuff, but I'm not exactly sure what kinda "stuff" I need. I thought this paper mache project was going to be a breeze. Uh... not so much. Anyone have any ideas? I'm open to suggestions. Help!


No comments:
Post a Comment